At Grant Graphics we’re always trying to find the best and newest applications through different testing of our materials and processes. We have composed a complete review of the different apparel decoration methods that we offer with our digital printing supplies.
The contestants are- heat transfer vinyl or HTV, direct to garment printing DTG, dye sublimation printing Dye-Sub, and direct transfer film commonly called direct to film or DTF printing.
Each technology showed differences in the process, the cost, the speed, the equipment and materials used.
For this case study we decided to use the logo's from our friends local restaurant to showcase how a common job can be done in many different ways. Here's what we learned!
Quick, before you keep scrolling. Can you guess which is which?
The Process
We printed the same images the same size for both the front (8" x 2.25") and the back (9" x 8.25"). For each method of printing we gave the shirt a quick press to reduce wrinkles and get any moisture out of each shirt.
The process that involved the least amount of steps was Dye-Sub we exported the logo from adobe illustrator as an .eps file, brought that over to Mimaki Rasterlink and printed with our Mimaki TS30-1300 64" Printer onto TexPrint White Sublimation Paper from Beaver Paper. We the pressed each side at 400°F for 15 seconds and our white polyester shirt was done!
The next process we found to be most simple was DTG. With the Roland BT-12 Desktop DTG Printer. The Roland Versa Studio software is very simple and user friendly. It accepts .jpg & .png so it was seamless to import and size the logos. Next we aligned the shirt onto the platen so that the 8.5 x11" printable area was centered correctly on the shirt. From there it is a simple print directly onto the shirt with its water based inks. The BT-12 comes with its own finishing unit, the "easy bake oven" as well call, we used to cure the white cotton shirt.
The newest and perhaps most recently talked about apparel printing method, Direct to Film DTF is up next. The Rip software SAi Flexi DTF accepts many types of files, we chose to use a transparent .png. The STS VJ-628D printer lays down the CMYK colors with white overlay on top of it. When the prints were complete, we sheet cut the film from the printer, sprinkled on Adhesive TPU Powder which only sticks to the wet printed surface of the film and then brought it over to a curing oven where it baked at 300°F for 3 minutes. Once baked, we pressed the transfer to the black shirt at 310°F for 15 seconds. You can also add an second press for 5 seconds to soak in the graphic more to the shirt if you choose. We found this helps the graphic take on the texture of the shirt.
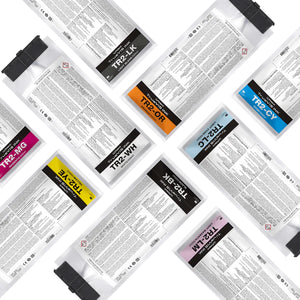
The most complex process but very impressive looking was Heat Transfer Vinyl HTV. For this method we used our Roland VG2-540 Printer/Cutter with TR2 Inks and Chemica printable hotmark revolution 1798. We started in Adobe Illustrator where we added the Roland CutContour cutline with a bleed to ensure the cut would land inside the printed colors. We exported the file as an .eps and imported that into Roland Versaworks rip software. In Versaworks we are able to add crop marks and select "print, then cut" so it automatically will cut out the design after printing. Once the VG2 completed its printing and contour cutting with a 45° blade, we sheet cut the vinyl and brought it over to the table to weed. This was the fun part as we had our newest team member learn how to weed vinyl. Note* our timing for this part may be slightly inflated based on it being his first experience however we needed to give him the pleasure to understand the nuances of this process. Once fully weeded, we applied ATT450 Medium Tack Transfer Tape to lift the printed and cut logo off of its original backing and onto the adhesive side to the transfer tape. Next we layed down the transfer tape with the logo to the black cotton shirt and pressed it at 285°F for 15 seconds. After peeling, you may opt to give HTV a second press to have it soak further into the material as well.
The Cost
For this we will be comparing the the materials based on cost per square foot.
- DTG: There is no media to transfer, we did not used a pre-treatment liquid solution, so it is just the cost of the inks for our specific application. Pre-treatment is popular to use for larger DTG Equipment.
- Dye-Sub: We sell the TexPrint White Sublimation Paper from Beaver Paper in a 44" by 393 ft roll.
For 44" by 393' roll it is $161.60. At 1,441 ft² the cost per square foot is $.11 cents.
- DTF: We sell the DTF Film from STS in 13" and 24" Rolls. Both rolls are 325 ft long.
For 13" by 325' roll it is $127.14. At 352 ft² the cost per square foot is $.36 cents.
For 24" by 325' roll it is $239.29. At 650 ft² the cost per square foot is $.37 cents.
With DTF we have to include the cost of the TPU Adhesive Powder.
This 1 Gallon Bottle is $70.00. This covers 67 Square Meters or 721 ft² making the cost per square foot $.09 cents
- HTV: The Chemica Printable Hotmark Revolution we sell in 20", 30" and 54" rolls.
For 54" by 22yd it is $623.13. At 297 ft² the cost per square foot is $2.09
For 30" by 22yd it is $314.51. At 165 ft² the cost per square foot is $1.91
For 20" by 22yd it is $211.01. At 110 ft² the cost per square foot is $1.92
We also sell our Grant Graphics brand HTV in a 30" by 150 ft roll.
For 30" by 150' it is $531.65. At 375ft² the cost per square foot is $1.42
With HTV we also need to include the ATT450 Application Transfer Tape.
This is $64.88 for 20" by 81' roll. This 135ft² is $.48 per square foot.
The Times
The Limitations
Dye-Sublimation requires a polyester coating to adhere to. This presents limitations for the type of material you can press it to. We have found that you are able to get away with a a very light colored yellow or pink, but only if you have a dark design. For most use cases you always want to be using a white polyester material. Also your designs are limited to the size of your heat press. Dye Sub is excellent for a print, press, cut, then sew together method- think a fully sublimated hockey or cycling jersey. The seems look great when it is fully sublimated on a large heat press and then sewn together. However it is challenging to achieve a full sublimation look on an pre sewn garment. For this use case of a front and back logo, it worked amazing and the colors really popped.
Direct to Garment for the Roland BT-12 is limited to light color cottons, you also can get away with a light colored grays, yellows, powder blue or pink depending on your design. There is no white ink in this machine so it is not possible to print white or to print an underbase necessary for black or dark colored garments.
Direct to Film DTF can transfer onto various materials including both light and dark garments because of the white ink in the printer. Both this and the HTV could have been printed on each of the shirt styles.
Heat Transfer Vinyl can also adhere to a plethora of materials, however the design we chose for this application proved to be tedious and time consuming to pick out the cavities of certain letters and intricacies of the design.
The Results
Dye-Sublimation- overall this was an amazing application with colors that really contrasted well on the white polyester, it was a quick and simple process and worked steller for this application of the logos onto a white polyester shirt. Maybe next we will get a sewing machine and try full sublimation. Did someone say Taquero Hockey Jerseys?!
Direct to Garment- Another very seamless process. From the easy .png setup and print with versastudio, to the direct print and cure. It was very easy and definitely preferable for a lower cost option and one-off applications. The colors are not as vibrant however the simplicity ad ease makes up for it. My favorite applications for this process and the Roland BT-12 are quick thoughtful gifts and one off custom designs.
Direct to Film- The biggest highlight to this was not having to weed out the intricacies of this complex design. From the rip software to powder and baking, once we got our rhythm with this process it was very smooth. If we were going to go 100 of these we would have printed roll to roll by using our automatic tpu powder shaker.
Heat Transfer Vinyl- The colors are very bright coming from the Roland TR2 inks especially the light blue and orange. This looks fantastic however was the most labor intensive option with the highest material cost.
DTF
Dye-Sub
HTV
DTG
What else would you like to see? Should we do a wash test with all 4 technologies? Did we miss something? Let us know in the comments or send me an email at garrison@grantgraphics.com. If you would like samples, more information or a remote demo on any of the equipment mentioned, please feel free to give me a call at 518-583-2818 Ext. 5
Cheers,
Garrison


